How To Do HTTP Requests In PHP With cURL
PHP
01/10/2019
Making HTTP requests is one of the most fundamental tasks that you can perform as a web developer. As such, it's important to know how to do them properly in the language of your choice. Having recently made the jump to PHP, it took me a while to understand how these were done. However, now that I've familiarized myself with it, I thought I'd share other newcomers 🤓 how to do HTTP requests in PHP with cURL, a built-in library.
What is cURL?
If you've spent some time in the web development sphere, you might have already heard of it. cURL, which stands for client URL, is an open-source command line tool that is used to transfer and receive data using internet protocols such as HTTP, HTTPS and FTP. Created by Daniel Stenberg in 1997, cURL is used in countless devices ranging from cars 🚗 and television sets to tablets and audio equipment. 🔉
So where does PHP come into play? Well, PHP has a module called cURL PHP that allows us to access the functionality offered by this awesome tool. Let me show you next how to use it, 'kay?

The Code
In this tutorial, I'll be showing you how to do the 2 most common HTTP request methods: GET and POST. However, regardless of which method you opt for (even PUT and DELETE) , they will all follow the same steps.
- Initialize a cURL session
- Set the URL and other various options for the session
- Execute the request and save the response
- Close the session to free up resources
Seems pretty straightforward, right? 😉 So how would this look like with code?
<?php    // 1. Open cURL session    $ch = curl_init();
    // 2. Set options    curl_setopt($ch, CURLOPT_URL, "http://dilshankelsen.com");    curl_setopt($ch, CURLOPT_RETURNTRANSFER, 1);
    // 3. Execute and save response    $response = curl_exec($ch);
    // 4. Close cURL session    curl_close($ch);?>
Perhaps with the exception of the options setting (which we'll get into next 😁), everything appears to be quite straightforward. At the end of these 4 steps, you're left with a variable $response that contains the response of our GET request. This may be JSON, a string or a complete HTML page.
Understanding options
Next to error handling, options are where you will be paying attention most of the time. Options are set with the curl_setopt(resource $ch, int $option, mixed $value) function, which takes three parameters: the cURL resource/session, the option and its corresponding value.
So you may be wondering: "So what kind of options can I set?" 🤔 Ahem.... maannnnyyyy! Too many to even go through one by one. Fortunately, you will only need a handful for most of your requests:
CURLOPT_RETURNTRANSFER- Return the response as a string instead of outputting it to the screenCURLOPT_CONNECTTIMEOUT- The number of seconds to wait while trying to connectCURLOPT_TIMEOUT- The number of seconds to allow cURL functions to executeCURLOPT_URL- The URL to fetchCURLOPT_CUSTOMREQUEST- Set custom request method such asPUTorDELETE. cURL defaults toGETCURLOPT_POSTFIELDS- An array of the data to send in a requestCURLOPT_HTTPHEADER- An array of HTTP header fields to set
A handy trick
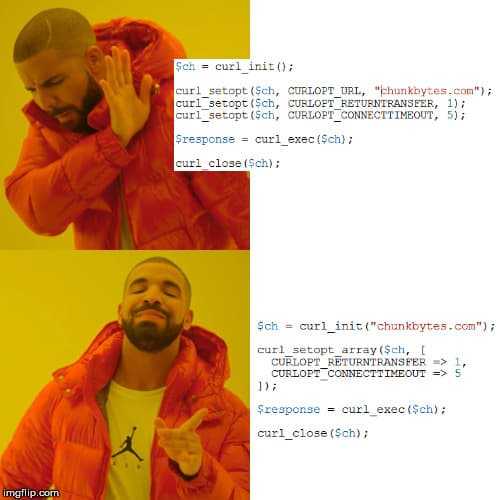
Now, it doesn't take a genius 🤓 to realize that you'll be repeating curl_setopt() quite a bit if you need to set several options. Of course, the creators were well aware of this and have provided us two ways to cut down on the repetitiveness.
First, instead of setting the URL with curl_setopt($ch, CURLOPT_URL, "dilshankelsen.com"), we can pass in the URL immediately when initializing the cURL session, like so: $ch = curl_init("dilshankelsen.com").
Second, we can use curl_setopt_array(resource $ch, array $options) to set multiple options at once. An example would look as follows.
curl_setopt_array($ch, [ CURLOPT_RETURNTRANSFER => 1, CURLOPT_URL => "dilshankelsen.com"]);

Receiving the response
As you surely noticed before, curl_exec($ch) is responsible for executing your HTTP request. In addition to that, it will return three different responses depending on the following conditions:
falseif the request fails to executetrueif the request executes without error andCURLOPT_RETURNTRANSFERis set tofalse- The result (e.g JSON) if the request executes without error and
CURLOPT_RETURNTRANSFERis set totrue
Another useful function at your disposable is curl_getinfo($ch), which returns information about your request, such as the response code or total transaction time.
Error handling
Errors ❌ happen... there's nothing you can do about it. But at the very least, you should know how to properly handle them with cURL. For this task, we have two functions: curl_error($ch) and curl_errno($ch). If applicable, the former returns the error message, while the latter returns the cURL error code. The most common way to use these two functions is with an if statement.
if (!curl_exec($ch)) { die('Error: "' . curl_error($ch) . '" - Code: ' . curl_errno($ch));}POST request
So far, all examples I've been showing you were GET requests. In fact, when no request method is specified, cURL simply defaults to GET. To tell cURL you would like execute a POST method, simply set the CURLOPT_POST option to true. However, I prefer to use the option CURLOPT_CUSTOMREQUEST as any method may be specified with it. One less option to remember! 😏
Without further ado, let's see how you would preform a proper POST request, with error and JSON handling.
<?php// Initialize cURL resource$ch = curl_init("http://dilshankelsen.com/doesnotexist");
// Data to send$payload = [  "item1" => "value",  "item2" => "value2"];
// Header to send$header = ['Content-Type:application/json'];
// Set cURL optionscurl_setopt_array($ch, [  CURLOPT_RETURNTRANSFER => 1,  CURLOPT_CUSTOMREQUEST => "POST",  CURLOPT_POSTFIELDS => json_encode($payload),  CURLOPT_HTTPHEADER => $header]);
// Execute the request and save the response$response = curl_exec($ch);
// Check for errorsif (!$response) {  die('Error: "' . curl_error($ch) . '" - Code: ' . curl_errno($ch));}
// Decode the received JSON$received_data = json_decode($response);
// Close session to clear up resourcescurl_close($ch);
In this example, we attached a payload to our request. For this, we needed to encode our payload and set the appropriate headers in the options. If you're not familiar with JSON handling in PHP, why not check out my article on this topic (shameless plug 😅).
